Our 1936 Olds with it's original owner, Jack's uncle, H.O. White. Circa 1940.

Thursday, May 19, 2011

May 10, 2011 -- Day 14

 
Well today I decided to re-build the steering box for the car.  Here are a few before, middle and after photos.


As the price tag for the car keeps climbing....lol.  A set of brand new bias ply tires to wrap our newly powder coated rims.  They came out looking great with the hub caps and beauty rings!  When we get the car painted they will get the final pin stripe around the hub cap like you can see in the brochure picture.

We had the drive shaft powder coated as well and installed the new U-joints.


Here is the rear axle getting ready to be re-assembled.  It too was sand blasted and powder coated.

                 Well you can't re-assemble a new steering box with out a newly refurbished pitman arm.

The fan came out really nice!


This is the lower control arm for the car.  Only one more thing we needed and it just arived today.  Thanks to Bob's Automobilia I now have the new rubber bushings for the assembly to keep the grease from squirting out all over the floor.  Thanks a million Bob!  No one else on the planet had those babies in stock. 

                      The rear differential cover looks great.  Soon to be mated back up with the axle.


Now this one was a piece of artwork.  This is the front spindle.  We took it all apart and  powder coated every piece.  After we finished we pressed in new bushings honed them out and installed new king pins, and new bearings, thanks to our friends at Baker Machinery, and so this is a fully rebuilt brand new unit now.  It's kind of sad no one will see this after the car is put back together.


Tuesday, April 19, 2011

April 18, 2011 -- Day 13


Well here we go again with another long overdue post.

Remember all that sandblasting?  Well, we had to have it sand blasted again.  It turns out if you use silica sand the powder coating will not stick very well, so you have to re-shoot it with a garnet media to get the finish right for the powder coat.  We made it much much easier for them anyway.  Felix is working away here stripping the frame for the last and final time
Here is Tony in the booth spraying some miscellaneous parts and getting them ready to bake in the oven.  No, all the parts there are not ours.  There was some fencing and other things that were getting the same color that day.
Voila!....before and after.  these are the radiator brackets for the car.  The old rusty one is off of the parts car.  We won't be needing it so it will be going up for sale to anyone who wants one for their project.

This is the leaf spring hardware, the top, are the ones we will use on the car, the others Ebay? trash? who knows!
Look at how nice the coil springs came out!  And the other squiglly things are the front fender brackets.

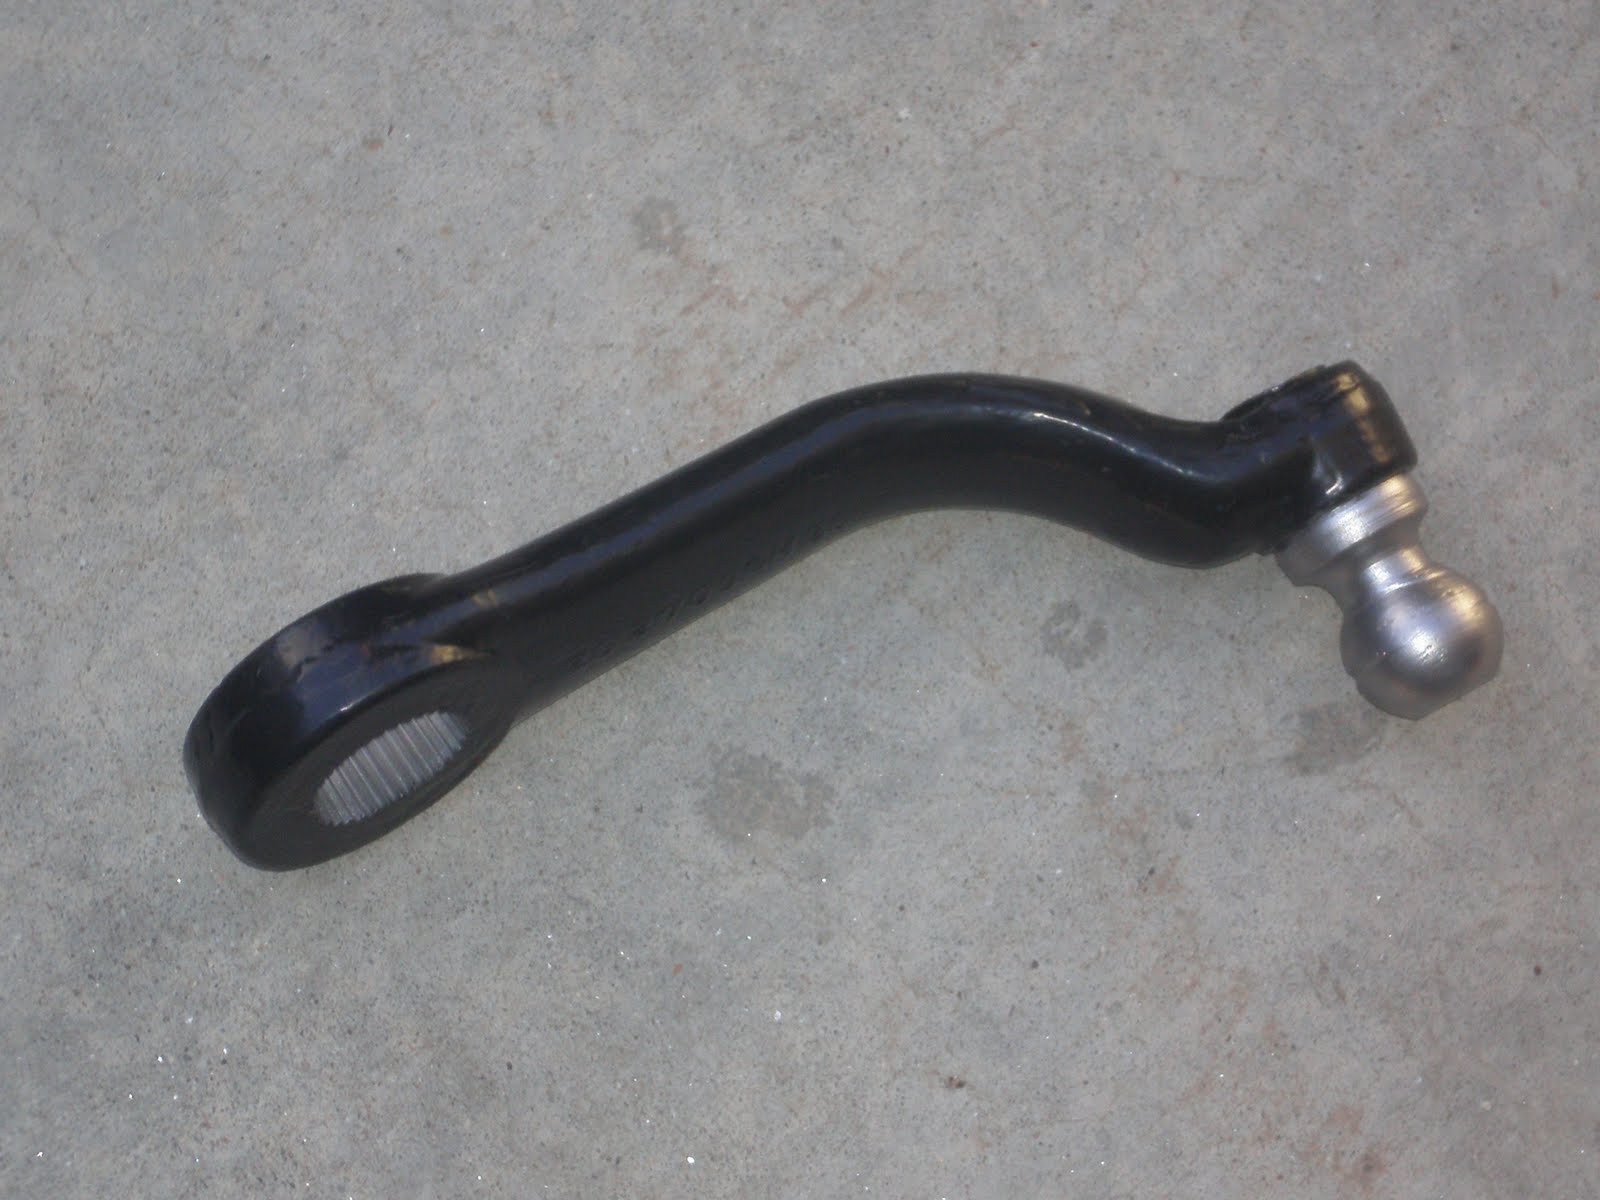
This will be one of the front control arms when it is all assembled.

It looks like a total mess but all of these parts will be the chassis for the car in the upcoming weeks.
Aaaaah yes......enter the bones of the whole build.  We traded in the old rust and got back a fresh new powdercoating.  Lou, the owner of Section 8 Powdercoating, does such good work that when I went up to get the frame and we found a couple of spots that were not to his liking he told me to come back tomorrow so he could re-shoot the whole thing again.  He wouln't let it go until it was right.  Remember when all busineses ran on a promise and a handshake?  And they wouldn't let you have it until it was right?
This is something we didn't see until we stripped all the rust off of the frame. This is the original serial number that was stamped three times on the left frame rail and also the engine block. This is what they talk about when they say numbers matching.


The chassis stamp on the mid section of the frame rail.  Keep in mind with the body on top of the frame rail you will never see this again.  Kind of neat to know it is under there.

This is the VIN tag for the car.  It is not the same as the Chassis number on the frame or the engine block.  I don't know why they factory didn't just use the same number for all three.  This is the number the DMV uses.  Kind of a funny story, when I got this car from Jack he had it regestered off of the engine block because you couldn't find this tag under all the grease.  After much cleaning and degreasing, we found this and changed the title over to this number, because it is the proper registration number for the car.

More work is being done every day, so once we have enough to make a worthwhile blog post, we'll update it again!

Monday, January 24, 2011

January 15, 2011 -- Day 11

So it has been a while since the last post.  I guess life gets in the way a little and time never stops.

The frame is almost finished getting blasted.  Who would have ever thought sand blasting would take so long?  On TV it goes by so quickly.

Marc and I started to tear down the frame and get it ready for powdercoating.

This thing is going to look so nice with a new coat of paint on everything.
 
 The front drums were a little bit stubborn but with a little bit of time we had them torn down.


The next time you see this coil spring it will have a shiny new coat of black paint on it.

 
 What is good for one side must be good for the other.  Isn't it funny how the first one takes twice the time to tear down as the second.  I think we are starting to get good at this.  I could open my own shop for 1936 cars if more than one person in each state had one.

 
Breaking down the front hub and spindle.
 
That main bolt on the steering assembly was tough to get out.  I guess it wanted to hang on tight after 74 years.
 
My son Charlie sandblasting away on the front end components, getting them ready for paint.
 
Well there you have it.  We have gone from rolling chassis to a heavy duty steel Rickshaw.  All in a days work.